Tuesday, December 14, 2010

Chocolate Russian Tea Cookies

These are an easy but addictive cookie.  Really rich and chocolately and perfect with a glass of milk or hot cocoa (or a nice heavy sweet drink like a berry dessert wine or Port).  Bite sized and cute, they're good for parties.

You'll need (for several dozen small cookies):

  • 1 1/4 cups butter, softened
  • 2/3 cup white sugar
  • 2 teaspoons pure vanilla extract
  • 2 cups flour
  • pinch salt
  • 1/2 cup unsweetened cocoa powder
  • powdered sugar for garnish
The steps:

  • Cream butter and sugar until fluffy
  • Add dry ingredients and combine.  Will end up a pretty stiff dough.
  • Cover and refrigerate for at least an hour
  • Remove from fridge & preheat oven to 350
  • Roll dough into small balls in your hand (about an inch in diameter) and place on a lightly greased baking sheet
  • Bake for 20 minutes
  • When cooled you can roll them in powdered sugar or (my favorite) place powdered sugar in a mesh screen and sprinkle it over top.  
Delish!

Wednesday, December 1, 2010

Ginger Cranberry Relish

I love this recipe for cranberry relish because it's unique and tart and goes well with everything.  Serve over turkey, sweet potatoes, rolls, cottage cheese, yogurt, sandwiches.  Soo yummy and much much fancier than what comes in a can (though, I must admit, that stuff is delicious).

For this simple recipe you'll need (for 6 servings):
  • 1 standard bag of whole fresh cranberries
  • 3/4-1 cup sugar
  • 1-1 1/2 tablespoons red wine vinegar
  • 1-1 1/2 tablespoons fresh grated ginger
  • water
The steps
  • Grate your ginger.  If using a fresh piece of ginger (which I've recently learned is a rhizoid not a root, thank you, Alton Brown), peel with a paring knife and cut into small pieces with knife, cheese grater or food processor.  You can use jarred or tube ginger, but will need to use more.
  • Measure out your other ingredients and set aside.
  • Pour all your cranberries into a thick-bottomed pot with just enough water to cover them about halfway and turn stove to medium high heat.  Stir berries until skin begins to split.
  • When the skin has split on the majority of the berries reduce heat to medium low and add sugar, vinegar, and ginger.  
  • Stir constantly until all of the cranberries have popped and the sauce has thickened.  A lot of steam will come off and it may become bubbly.  Taste it (very carefully) to see if you need to adjust any ingredients for your taste.  
  • Continue stirring for about 5-7 minutes until enough of the water has evaporated so that it is truly a relish but not a thick jello.
Transfer to another dish, place in the refrigerator to cool, and serve.  Freezes well too, but cool in the fridge first.  Yum!

Wednesday, November 10, 2010

Savory Bread Pudding

Okay, so I don't have a photo of this but trust me, it's delicious.  Basically a glorified egg bake that is easy and super super delicious.

You'll need (for 2 servings):
  • 4 eggs, beaten until light
  • 1 cup milk (use half & half or cream for thicker or richer)
  • 1 carrot, shredded
  • 1 leaf of chard, chopped with kitchen shears
  • 2-3 leaves of spinach, chopped with kitchen shears
  • a few ounces of Swiss cheese, shredded or in small chunks
  • 1-2 thick slices of delicious bread, cubed.  I used a garlic herb bread from the farmer's market that is to die for.  Another good choice is dill bread.  
  • 1 tablespoon Italian seasoning
  • a few dashes salt
  • a dash paprika
  • 1 extra teaspoon dried basil
The steps:
  • Preheat oven to 425
  • In a large bowl, combine eggs and milk.
  • Add seasonings and stir.
  • Add cubes of bread and stir gently so that they absorb the liquids
  • Add remaining ingredients and gently combine
  • Pour ingredients into a grease square corningware baking dish, with a lid.
  • Add more milk if the liquid mixture doesn't mostly cover the dry ingredients
  • Bake 10-15 minutes, or until puffed up and the bread begins to brown.
  • Let stand 5-10 minutes and enjoy
This is a very versatile recipe that, like quiche, can be made with many different kinds of ingredients.  Try it with various combinations of carrots, spinach, chard, peppers, mushrooms, onions, sun dried tomatoes, etc.

Spicy Southwestern Stew

Sorta my version of tortilla soup, but without chicken.  And this turned out a lot thicker than I meant for it to, so we're calling it a stew.  This is a recipe using lots of canned goods, so quick, easy, and cheap.  Would probably still be delicious with little tortilla strips in it.

You'll need (for 4 big servings):
  • 2 cloves garlic, crushed & chopped
  • 1 cup brown basmati rice (measured raw).  Cooked for about half the prescribed time
  • About a tablespoon olive oil
  • 12 oz can tomato paste (though, if you want it thinner, use an 8oz can)
  • 11oz corn
  • 15oz diced tomatoes
  • 2 cans black beans, drained and rinsed.  I think the easiest way to do this is to empty the can into a mesh strainer and rinse under the faucet
  • 32oz vegetable broth (AKA one carton)
  • 2 carrots, shredded
  • 1 small bunch spinach (cut in slices using your kitchen shears)
  • 1 teaspoon paprika
  • 2 teaspoons cumin
  • 2 teaspoons red pepper flakes
  • 1 teaspoon seasoned salt
  • 1 teaspoon cayenne pepper
  • 1 teaspoon chili powder
  • 1/2 teaspoon onion powder
  • 1 heaping tablespoon brown sugar
The steps:
  • Heat garlic over high heat in olive oil until aromatic.
  • Reduce heat to medium-low and add all of the canned goods
  • Add carrot, spinach, and rice
  • Season
  • Let simmer for about 15-20 minutes, until rice is tender.
It's that simple.  Serve with tortilla strips and/or shredded cheese.

Published with Blogger-droid v1.6.5

Monday, November 8, 2010

Delicious Nutritious Breakfast


Wondering what to do with you chard, carrots or other fall crops?  I'm telling you, I've been making some seriously delicious breakfasts lately.  I've just signed up for a 3 week fall CSA share that includes all kinds of greens, chard, carrots, spinach, beets, and onions.  It can be hard to use up all these greens because I'm just not always in the mood for salad.  I also, usually, am rushed in the morning because I have to get to work (and have a hard time getting up early).  Anyhow, here is the basic delicious, 5 minute egg breakfast.

You'll need (for one serving):**
  • 2 eggs
  • 1/2-1tablespoon skim milk
  • half a carrot stick
  • one big leaf of chard
  • 1 garlic clove
  • 1 dash seasoned salt
  • a couple dashes Italian seasoning
  • olive oil to coat the pan
The Steps:
  • Pour some olive oil in a small, nonstick skillet
  • Use your vegetable peeler to grate thin strips of carrot directly into the skillet.  This recipe is also great for not creating many dishes (the bane to my existence).
  • Use your kitchen shears to cut the chard into small strips directly into the skillet
  • Use a large knife to crush the garlic clove and place it in the skillet
  • Turn heat to high and crack in eggs.  
  • Add milk and seasonings.
  • Stir constantly to avoid burning and cook until your desired done-ness.  Serve and eat.  Delicious with a little salsa, hot sauce, or parmesan cheese.
**The caveat to this recipe is that every single ingredient is organic and local (aside from oil) and the eggs are fresh from a local farm where the chickens run around and get chased by children.  This makes a world of difference in the flavor.
Published with Blogger-droid v1.6.

Tuesday, October 26, 2010

Rolled Sugar Cookies

These are my famous rolled sugar cookies.  They are the easiest rolled cookies I've ever made and the most delicious.  I probably make a batch of these at least every other month.  

You'll need (for 5 dozen small-medium cookies):

  • cookie cutters
  • 1 1/2 cups butter
  • 2 cups white sugar
  • 4 eggs 
  • 1 tsp vanilla
  • 5 cups flour
  • 2 tsp baking power
  • pinch salt
The steps:

  • Cream together butter & sugar until smooth.
  • Beat in eggs and vanilla.
  • Add dry ingredients.
  • Cover dough and chill for at least an hour (I'm making the dough now to bake on Saturday or Sunday).  I like to refrigerate my rolling pin too.
  • When you're ready to bake, preheat oven to 400degrees.
  • Dump dough onto a lightly floured surface and kneed just a few times.
  • Roll out using a rolling pin to about 1/4inch thickness.  
  • Cut into desired shapes and transfer to a greased cookie sheet
  • Bake 6-8 minutes and remove from sheet quickly.
Serve these frosted or glazed or just with sprinkles (which you can add prior to baking if you want.  Just brush cookies with egg whites first).  This dough is also good for making a fruit pizza (dough crust, sweet cream cheese, and fruit = yum!).

A picture will come shortly, after Halloween when I've decorated these.  The theme for my Halloween party is everything you loved about a kids' Halloween party + booze.  So, a bunch of adults decorating their own cookies, playing games, and so on greatly enlivened with hard cider and microbrews.  So, I will be using my Halloween cookie cutters (thanks to my sister for those), to make these sugar cookies then prepare several different frostings and have those and sprinkles available for decoration.

Monday, October 25, 2010

Hearty Vegan Chili


I have recently made the life choice to be a vegetarian in order to reduce my carbon footprint.  I will occasionally and selectively eat fish, but only those that are fished sustainably and responsibly and that do not have dwindling populations.  I have found that the NRDC has a really helpful guide to what fish to eat and what to avoid.  Even if you aren't a vegetarian/pescetarian, you should take a look at it.  Anyhow, I love chili, so here is my vegan version.  I did not and do not use soy meat replacements as soy is very frequently grown in totally unsustainable ways, not to mention the fears and uncertainties associated with (unlabeled) genetically engineered foods (Check out the documentary "Future of Food").  Potatoes bulk up the texture, beans ad protein, and portabella gives a meaty flavor.  Note, all measurements are pretty approximate.  Adjust to create the chili you want.  I feel like chili should never taste the same twice.

You'll need (for about 6 servings):
  • a couple tablespoons olive oil
  • 4 cloves garlic.  Mince some and keep some whole.
  • 1 1/2 cups shredded russet potato (shred using the coarse side of your cheese grater or the grating attachment on your food processor)
  • 1 1/2 cups sweet corn
  • 1 cup blanched yellow beans (chop if you'd like)
  • 4-6 tomatoes, or a can of tomatoes (with juice).  I used a jar of heirloom tomatoes from the summer that I had canned.  
  • 12oz can tomato paste
  • 24oz mixed beans (half a big jar of Randall's mixed beans or a couple small cans)
  • 1 portabella mushroom, cubed
  • 10oz frozen chopped spinach (no, unfortunately, I hadn't frozen any from this summer, so had to use store bought)
  • Spices.  This is where you have fun.  Make it more spicy (cayenne, hot sauce, red pepper) or less.  More earthy (cumin, paprika, cinnamon) or more acidic (onion, garlic, hot sauce).  Totally up to you.  This is what I used for this particular batch.
    • 3-4 tablespoons chili powder
    • 1 teaspoon crushed red pepper
    • 1/2 teaspoon cumin
    • 1 teaspoon cayenne pepper
    • 2 teaspoons cinnamon
    • 1 tablespoon dried onion
    • 1/4 cup fresh parsley
    • 1 teaspoon paprika
    • 1 1/2 tablespoons hot sauce.  I used a vinegar-based habanero sauce.
    • seasoned salt & pepper to taste
The steps:
  • Saute minced garlic and potatoes in olive oil on med-high heat.  Season the potatoes directly with about a third of the chili powder.
  • Add beans and spinach and continue the saute briefly
  • Add tomato paste and tomatoes.  If you are using fresh tomatoes (vs. canned or jarred) add about 1/4-1/2 cup vegetable broth or just plain water.  If using canned tomatoes, use the juice its packed in
  • Add corn, beans, parsley, and whole cloves of garlic.
  • Reduce heat to low and add portabella.
  • Now you start seasoning.  Season now using about half of the measured ingredients.
  • Let simmer on low for about a half hour.  Sample and season again accordingly.


Great, delicious vegan chili.  

Be on the look out for my famous sugar cookies that I'll be making for Halloween.  


Published with Blogger-droid v1.6.3

Monday, October 11, 2010

Banana Bread Cookies

Fresh from the oven!
An attempt to bake cookies when I didn't have my usual staples around (chocolate chips, oatmeal, brown sugar).  I did, however, have some bananas frozen for occasions just as these.  These cookies are light, fluffy, cake-y and unique.  Could be made even more interesting if you added chocolate chips.

You'll need (for 30 cookies):
  • 1/2 cup butter, softened
  • 1 cup sugar
  • 1 egg
  • 1 cup mashed bananas
  • 1 teaspoon baking soda
  • 2 cups flour
  • 1 1/2 teaspoons pumpkin pie spice
  • 1/2 teaspoon (extra) cinnamon
  • 1/2 - 3/4 cup crushed walnuts
The steps:
  • Preheat oven to 350degrees
  • Mash bananas and mix with baking soda in a small bowl.  Set aside.
  • Cream together butter and sugar until fluffy.  Add egg.  
  • Add banana mixture
  • Add dry ingredients gently, until just combined.
  • Fold in walnuts, gently
  • Drop by heaping teaspoons onto a well-greased cookie sheet.  They don't spread much, so can be placed pretty close to each other.
  • Bake for about 11-12 minutes (until the edges have started to brown, but not the whole cookie)
  • Remove promptly from sheet to avoid burnt bottoms
That simple.  Took me about 20 minutes start to finish.  Yum :)


Published with Blogger-droid v1.6.3

Asian Dressing/Marinade

First off, big apologies on not posting more recipes lately.  I don't really have a good excuse.  I've done some pretty excellent cooking (fried chicken, black bean soup, fried okra, etc.).  Just haven't been posting as much.  Let's get back on track.

This is a pure invention, because I had some sake that was starting to turn not so tasty.  Like I've said before, I really like to make my own salad dressings.  I'd argue this is just about the most delicious I've ever made.

You'll need (for 2 big servings or 4 smaller servings--as a dressing for a large side salad).  All of these measurements are definitely approximations

  • 1/2 cup sweet sake.  I used the pretty cheap plum sake I'd gotten from the local grocery store.  
  • 1 tablespoon honey
  • 1 teaspoon sesame oil
  • 1-2 tablespoons soy sauce
  • a few dashes oriental seasoning blend (I use Tone brand Oriental Five Spice)
The steps:

  • In a small sauce pan, boil the sake until the alcohol has burned off.  You'll be able to smell the booze in the steam that it gives off.  The sake will also thicken as the alcohol burns off.  You may also (carefully) taste it to be sure it as all burned off.
  • While still on the stove, add honey and stir to combine.  Beware: when you add the honey, the sake may try to boil up over the side of the pot.  I had to repeatedly turn on and off the stove to avoid this overflow until I had the honey combined.
  • Add rest of ingredients and taste.  Add more seasonings as needed.
I would serve this over a salad that has strong flavored greens (no iceberg here!).  A nice blend of red leaf lettuce, arugula, spinach, kale, and dandelion leaves is, I feel, the most delicious.  If you haven't tried all of these in a salad before, do!  You'll be amazed at how delicious salad can be.  I also love chopped apples in my salad and think they'd go well with this dressing.

In other news, I remade French Onion soup, a little modified from the recipe I posted awhile back.  The first time I made it, I used old port.  I didn't have any port sitting around, so I used some Cabernet Sauvignon and added about 3 tablespoons of brown sugar in order to get the sweetness that I had in my first recipe.  Not as good as the first batch, but still pretty delicious.

Soon to come recipes (hopefully):

  • Caribbean-style black bean soup
  • Butternut Squash & Apple Bisque
  • French Fries (homemade!)
Sunday, September 19, 2010

Essential Spices/Seasonings/Flavors

Okay, so you don't need an entire cabinet to do some really very excellent cooking and baking.  I will outline what I think the most basic spice essentials are to make a wide variety of dishes and baked goods.  Each spice is linked to a descriptive page.

Most Essential:

  • Garlic
    • Let's face it: it's good in everything (and good for your heart)
    • I like to buy it in bulbs so that I have more options of mincing, chopping, or using whole; however, the pre-minced jars of garlic do have some merit for their ease
    • There is a remarkable variety of garlic so I encourage you to try different ones.  At some farmer's markets, you may find a stand that deals entirely in garlic so you can sample and learn different uses for the plant.
  • Kosher Salt
    • The coarse grind and strong flavor of Kosher salt means that you can use less of it than traditional varieties.  Additionally, the coarse grind is also good as a means to help break up herbs in things like pestos
  • Coarse Grind Black Pepper
    • Again, coarse grind means strong flavor.  Go big and get the large "restaurant grade" containers at a local restaurant supply store
  • Italian Seasoning
    • Contains a mixture of commonly used herbs in Italian cooking: basil, oregano, thyme, rosemary.
    • Remarkable versatile in a wide variety of cooking.
  • Cayenne Pepper
    • Easy addition to simply add some heat to your dishes.
  • Chili Powder
    • contains cayenne, often, but sometimes other spices too.  Often lends a smoky flavor.
    • This is a place where spending more may yield a better product, but the cheap stuff is okay too
  • Cinnamon
    • Pretty much essential to any dessert making, but also has uses in cooking.  For instance, a bit of cinnamon in chili or stew makes for a very interesting and delicious dish
    • You can buy the ground cinnamon or have fun with grating the cinnamon sticks yourself.  I've found that by grinding my own (using a zester, actually), I got a very strong flavor
  • Vanilla
    • Again, essential for baking.
    • Be sure to buy the "pure vanilla extract", not the imitation
Less Essential but very nice to have

  • Cumin
    • A big part of Spanish cooking and you'll find it in the southwest too.  A marvelous addition to soups
  • Paprika
    • To a lot of people, just a garnish, but paprika adds a subtle, earthy flavor to many dishes.  I love it in sweet corn, chard, and many vegetable soups
  • All of the ingredients of your Italian Seasoning
    • Having them all separately allows you more control over the final flavor of your dishes.  Also, allows you to make things with Greek flavoring (more oregano), or a traditional rosemary lamb dish, etc.
    • A much cheaper alternative to saffron if you want to make yellow rice
  • Bay Leaves
    • A great flavor enhancer and addition to many soups and sauces
    • Also a natural bug repellant
  • Almond Extract
    • A nice thing to have to flavor various pastries, frostings, etc.
    • In fact, having several pure extracts (not imitation flavorings), like lemon and orange create a lot of versatility in your baking production.
  • Curry
    • Pretty self-explanatory for what to use this for
  • Ginger
    • This ingredient has many more uses than many people believe.
    • A great addition to some soups (black bean, squash, etc.), curries, marinades, etc.
    • Also versatile for digestion issues: add some to tea or just eat some plain pickled ginger and you'll feel great.
    • And ginger cookies-->yum!
    • I do like to get whole ginger for the same reason as buying whole garlic: I can grate it if I want or chop it or slice it for pickling.  If you're just going to want minced ginger, I'd recommend the kind that comes in a tube and is refrigerated.  It's often by the produce at the store.  The ginger in the jar has almost no flavor, so don't waste your money.
There's certainly many many more spices to be had, but these are the most very essential.

Tuesday, September 14, 2010

Caprese Pasta Sauce

Oh wow, the Droid really didn't do a good job capturing this one!
More yummy than it looks!
I'm calling this "Caprese Pasta Sauce" because it has all the flavors of a Caprese salad.  I love creamy pasta sauce, so I thought I'd give it a try.  Turned out pretty well and is very filling.  I froze some for winter.

You'll need (for about 6-8 servings):
  • 1/2 stick butter
  • 1 1/2 tablespoons flour (ish)
  • 1lb fresh mozzarella
  • 1/4-1/2 cup shredded Parmesan
  • 2 cups (ish) half n half
  • 1/2-1 cup vegetable juice (or tomato juice)
  • 2 cups (ish) roasted veggies (eggplant, yellow squash, bell peppers)
  • 2-3 tablespoons olive oil
  • 1-2 tablespoons red wine vinegar
  • 1 bunch fresh basil
  • Italian Seasoning & kosher salt to taste
The Steps:
  • Roast veggies as directed in my "roasted summer veggies" post
  • Chop veggies into small pieces.
  • Cut butter & cheese into small, easy to melt pieces
  • Melt butter in a non-stick pot & add enough flour to make a good rue
  • Add cheese and about half of the half n half and vegetable juice
  • Stir constantly on medium high heat until all cheese melts
  • Add enough more vegetable juice and half n half until sauce reaches a smooth, easily pour-able consistency
  • Add olive oil also to help with consistency
  • Add the rest of the ingredients, chopping basil coarsely.  Season carefully so as not to overpower your delicious fresh basil.  
  • Simmer long enough to incorporate, but avoid over cooking
  • Serve over "shape" pasta, like shells.
This is a very yummy, pretty simple recipe.  It's very very rich, so you really don't need much sauce for one serving.  I also think this could be good with some grilled chicken.  


Published with Blogger-droid v1.5.9

Friday, September 10, 2010

Roasted Veggie Caprese Salads

These are the Caprese salads I made for wine night guests using the roasted veggies and candied tomatoes I made several days ago.  They are delicious appetizers that are a little bit fancy.  Goes well with a glass of Pinot Noir (in my non-trained opinion).

You'll need:

  • roasted eggplant
  • roasted yellow squash
  • fresh mozzarella (the soft kind that comes in a ball)
  • fresh basil
  • candied tomatoes
  • olive oil leftover from roasting veggies/tomatoes
  • balsamic or red wine vinegar
  • Italian seasoning
  • kosher salt
The steps


  • Assemble the salads in this order, from bottom up: roasted veggie, one or two leaves of basil, mozzarella, tomato.
  • Using the leftover olive oil, add vinegar, Italian seasoning, and kosher salt until it tastes like a good salad dressing.  Go heavy on the vinegar.
  • Drizzle this dressing over the top & serve
You can also assemble these salads over slices of fresh tomatoes and not use roasted veggies or candied tomatoes.  I still have roasted veggies, mozzarella, dressing, and basil left.  I plan to make a creamy pasta sauce using those leftovers.  More on that in a few days when I have more time to cook.

Monday, September 6, 2010

Sautéed Red Chard

Red chard, of the variety I used in this recipe.
Didn't take a photo of the final dish because we were hungry.


I got another bunch of chard in my share and was looking for a quick, easy side dish using them to go with a fish dinner.  This is a very easy recipe which will help to cut the bitterness that chard can sometimes have.  Went very well with the fish fillets I served it with.  

You'll need:

  • One bunch of chard
  • One red onion
  • One large clove garlic, or a couple smaller ones
  • about a teaspoon each Kosher salt and coarse ground pepper
  • Paprika, Cumin, and Cayenne pepper to taste.  More Paprika & Cumin, go light on the Cayenne--this shouldn't be a spicy dish.
  • 2 tablespoons olive oil
  • Parmesan cheese (optional)
The Steps


  • Wash and chop the chard.  You have a few choices here.  I simply cut the leaves coarsely using my kitchen shears.  If you want to use the stems, cut the leaves off the stem and cut them coarsely.  Chop the stems into smaller pieces, as they need to be smaller so that they can get tender
  • Slice the onion into about 1 inch slices.  You may chop smaller if you'd like, but then you'll need to be careful in cooking not to brown them.
  • Chop your garlic coarsely
  • Heat oil in a pan then add chard, onions, and garlic.  Stir together.
  • Add seasonings to your liking.
  • At the very end, if you'd like, add some grated Parmesan.
  • The final product should be tender but not browned onion and tender chard, which will appear a brighter green after cooking.
I just served this as a side dish, but I think it would be good over brown rice.

Sunday, September 5, 2010

Roasted Summer Veggies

Several varieties of heirloom tomatoes, eggplant, bell pepper, yellow squash.  And that weird little greenish white thing to the left of the squash is actually a cucumber.  Who knew?  Didn't roast that.

I heard about making candied tomatoes in the oven while listening to "Splendid Table" this morning, so I decided to try it.  While at it, I thought I'd roast some veggies.  I plan to use these veggies as a base on which to place little Caprese salads for Thursday night wine night.  The tomatoes may contribute to those caprese salads or may just be a snack or will go well over pasta.

You'll need:
  • Veggies!  
    • For candied tomatoes, get really juicy tomatoes, not Romas.  Heirlooms, as always, are best, but you can find some really juicy hybrid varieties.  I'd say the smaller the better, as those tend to be juicier.
    • For veggies, the best types for roasting are eggplant (and I prefer the light purple variety you see in my photo.  I've found the long, skinny, light purple eggplant are about 10 times as flavorful as the typical large round, dark purple ones), yellow squash, zucchini, peppers, red onions.
  • a cup or so of olive oil.  You'll need enough to cover the veggies and sit beneath them in the pan while roasting
  • a few pinches of kosher or sea salt
  • Italian seasoning
  • a couple tablespoons red wine vinegar or balsamic vinegar
The steps:
  • Preheat oven to 400degrees
  • Wash and core your tomatoes, but don't seed.  Small ones may be chopped in half, slightly bigger ones in quarters, and so on.  You want to have about 1 inch segments.
  • Wash and sliced your other veggies.  Since I wanted flat veggies for little caprese salads (also good for sandwiches), I cut them thin.  For the squash, I cut the ends off then made slices on the bias.  For the eggplant, I cut the stem off, sat it upright resting on the cut part, and sliced large, flat slices vertically.  Peppers were cut into strips, too small and they'll burn.
  • Place all of your veggies into a deepish metal pan.  I used a large casserole.  Tomatoes should be placed skin side down and other veggies laid out flat.
  • Coat with olive oil.
  • take a few pinches of salt and sprinkle over the top
  • The tomatoes need nothing more, but you should generously sprinkle the other veggies in Italian seasoning and vinegar.  (A shortcut to this is to coat the veggies in Italian dressing)
  • Roast in the oven for 20 minutes.  Remove all veggies but tomatoes.
  • Roast tomatoes for 10 more minutes at 400 degrees.
  • Reduce heat to 350 and roast tomatoes for another 30 minutes.
  • Reduce heat to 300 and roast for another 30 minutes.  If, after this go round, the tomatoes aren't starting to darken, reduce the heat again to 250 and roast for another 30 minutes.
Store veggies in containers on their own.  Store tomatoes in containers with the oil they roasted in.  Can be frozen.

When serving, use the veggies as you'd like.  For the tomatoes, drain off the oil then serve.  Keep the oil from this roasting, which will be a great addition to marinades, soups, and sauces.

Published with Blogger-droid v1.5.8

Sunday, August 29, 2010

Kitchen Essentials

Great apologies for how long it's been since I've written.  Haven't been cooking that much lately because I've been away from home a lot in the past couple weeks.  I don't have a real magical recipe to share with you today,  but I thought I'd outline some items that I believe are kitchen essentials.  I am open to suggestions as well.

These are the tools that I believe are a necessity for successful, easy cooking.

  • Sharp Knives.  Without sharp knives, you will just get frustrated.  It's also safer.  You need a paring knife, a good serrated knife and a large knife for chopping.  If you get more, that's fine too, but you'll probably just stick to these three.  I've found that more expensive does not equal a better product.  My steak knives are from the dollar store and my big knives are just store brand.  I've used more expensive knives and found that they get dull quickly.  Though, if you have money to burn, ceramic blades are amazing.
  • A couple cutting boards.  This is especially important if, like me, you don't have a dishwasher.  Regardless, it's a good idea to keep a separate cutting board for meat and another for produce.  Flexible plastic cutting boards are useful for chopping then pouring into a pan or bowl, but I have a certain love affair with my bamboo boards.
  • A glass 9'' x 13'' casserole.  You can use this for anything: casseroles, brownies, quiche, cornbread, whatever.  9X13 is the standard recipe size.
  • At least one mixing bowl.  You can get a set if you'd like, but one is a good minimum.  Get a sturdy one.  I have a set that has rubber on the bottom so they don't slide around the counter when mixing.
  • A good can opener.  There is little more frustrating than a crappy can opener.  Like knives, higher price does not equal higher quality.  Get a sturdy one with a big handle.  Mine is from Goodwill and works better than a new one I used to have.
  • Rubber (or silicone) spatula.  Essential for scraping bowls and other dishes.  Be sure yours has a sturdy handle.
  • Plastic spatula.  So you don't scratch your nonstick pans.
  • A good skillet.  Get a nonstick skillet that's heavy with a thick bottom.  Insulated handles are nice, but not necessary.  You can get a million sizes, but just get a big one if you're on a budget so you can cook a lot or a little.
  • A sturdy sauce pan.  A medium size pot will serve most of you needs.  Doesn't need to be nonstick, but can be if you'd like.  Most important here is a very thick bottom.
  • A heavy duty jumbo size stock pot.  Again, thick bottom is essential.  No need for nonstick.  This is what you use to boil a dozen ears of corn or cook for 20 people.
  • A sturdy jelly roll pan (cookie sheet).  Like the pots, thicker is better.  Don't go cheap.  Air-puff pans are amazing, but if you grease a good one, that's fine too.
  • Freezer bags.  Be sure to get these if you plan on doing any real freezing or keeping for the winter.
  • Wooden spoons.  More environmentally friendly than plastic and last longer too.
  • Ladle.  For serving soups or for transferring from pot to storage containers.
  • Glass liquid measure.  Pyrex or Anchor.  I never understood the point of a one cup liquid measure, so I say at least 2 if not 4-6 cup measure.  You can use it for measuring, melting butter, or mixing ingredients in.
  • Measuring spoons.  I don't have much of an opinion on these, but get some you can keep straight.  I, of course, prefer metal.  It's nice when they attach so you don't loose them.  I have metal, double-ended spoons (ie one end is a tablespoon and the other is a teaspoon etc) that hook together.
  • Measuring cups.  Just get 1 cup, 1/2 cup, 1/3 cup, and 1/4 cup.  Everything else is unnecessary.  I have metal ones that can hang up.  Like spoons, good if they have a way to stick together.
  • Cheese grater.  If you shred your own cheese, you'll save a lot of money.  Also comes in handy for grating veggies for things like cole slaw or carrots for salads.  Get this kind that has different types of surfaces for grating, zesting, slicing.  Mine has a clear plastic side with measurements so you know when you've grated a 1/2 cup of cheese.  It also has a bottom that slides on and off.  Very handy features, but not essential.
  • Kitchen shears.  ie sturdy, very sharp, stainless steel scissors that come apart for easy cleaning.  Great for cutting herbs.  Some have built in bottle openers.  Some knife sets come with a pair.
  • Whisk.  Essential for beating eggs or whipping cream.


So, that's what I deem necessary.  Here are a few more items that are nice to have, but nonessential (I have very few).

  • Food Processor.  I crave one of these so badly it hurts, but you can survive without them if you are patient.  It will improve your knife skills if you don't have one.  Still, I crave one so badly.  Get a good brand, splurge on something like Cuisinart.
  • Stand Mixer.  Another thing I crave.  You can make do with a hand-crank mixer, but this speeds things up certainly.  The very nice Kitchenaid mixers have attachments for making pasta, kneading bread, and many other features.  They will last you 30 years, so it's worth the investment.
  • A colander.  I survived without one in my place for two years.  Having one now is easy, but if you're good at holding a pot lid on, you can live without one.
  • Tongs.  Metal, restaurant-style tongs that lock are such a convenience.  I use them for everything, probably more than any other utensil I have.
  • Muffin pans.  Just opens the door for more creations.
  • Funnels.  Having a variety of sizes makes for easy storing of food and transporting from one container to another.
  • Pastry cutter.  I've debated buying one of these for a long time because it certainly makes combining pastry dough loads easier, but I'm surviving with my own method.
  • Probe thermometer.  This way you know for sure if your meat is done.  Without one, you'll get pretty good at touching steaks or chicken breasts to know if they're done, but it's very very difficult to know if something like a ham is done.  You can spend as much money as you want one one.  I splurged and got one that connects to a digital screen that you can magnet onto your oven.  That way, you can know the temperature is without opening the oven.  You can also set alarms to go off when it reaches a certain temperature.
  • Vegetable peeler.  If you have a sharp paring knife, you don't need this, but it sure makes life easier.  And besides peeling veggies you can use it to make nice long strips of veggies like carrots for salads or omelets.  
Beyond these goods, I always keep a few food items well stocked in my kitchen.  If you have all of these items, then you can make any number of meals very quickly, easily, and without a trip to the store.
  • butter
  • rice
  • pasta
  • canned or jarred beans (your favorite kinds)
  • canned tomatoes
  • frozen veggies (whatever you know you'll eat, but especially things like corn, spinach, etc. that are good in many many things)
  • canned tuna
  • a myriad of spices
  • kosher salt & coarse ground pepper
  • flour
  • sugars
  • baking soda
  • baking powder
  • all-purpose baking mix
  • cocoa
  • nice and not so nice olive oil
  • cooking spray
  • canned tomato paste
  • oatmeal
  • a variety of vinegars
  • bouillon
  • garlic
  • onions
  • eggs
  • cheeses
  • milk
  • a hot sauce you really love
With these ingredients and some imagination, you can make about a million things.  You'll see that all the recipes on my list use some of these ingredients plus something special.


Alright, that's my pedagogical post.  

Monday, August 9, 2010

Cold Creamy Sweet Corn Soup

Sorry for terrible picture quality and messy background, but you get the idea.
Here in Iowa, we truly do have the greatest corn in the world (my homestate of Indiana is a close second).  I got a dozen ears of corn in my share last week and wanted something delicious to use them in.  Also, some friends and I have just instated Thursday night wine and hors d'oeuvre nights and I needed something yummy, appropriate for my non-air-conditioned apartment, and good in small portions.  Hopefully the girls will like it, but I'll have to wait and see.

You'll need (for 4ish small servings):
  • 1/2 stick butter
  • 2 heaping tablespoons flour
  • 1/2 pint half & half (at least, you'll need to add more before serving)
  • 1/2 tablespoon vegetable bouillon
  • Equal parts pepperjack, mozzarella, and Parmesan cheese (all grated)
  • 1-2 teaspoons paprika
  • 1-2 teaspoons cumin
  • chili powder and cayenne pepper to taste (just decide how spicy you want it to be)
  • 2-3 ears of sweet corn, cooked (depending on size.  I had some monster ears, so I only used 2)
  • a little extra half & half or milk before serving
The steps
  • In a well-insulated (preferably nonstick) pot, melt butter on medium high heat
  • Add flour and stir quickly until smooth.
  • Add half & half, bouillon, and cheese.  Stir constantly until cheese has melted.  You may need to adjust the heat to avoid burning, but you must stir constantly.
  • Season as you'd like it, tasting periodically.
  • Add corn.**
  • Refrigerate
  • Before serving, add enough milk or half & half to get a smooth texture.  Dish out and garnish with paprika
This is definitely a delicious soup and you can personalize it based on how spicy you like your food.  If you want to bulk it up, add black beans and/or tomatoes to make a yummy, chilled, southwestern soup.

**I would recommend cooking the corn several hours or the day before and refrigerating it before trying to cut off the kernels.  If you haven't ever removed kernels from a corn cob, the key is using a sharp serrated knife--a steak knife seems to work best.  Hold the cob vertically in your left hand and use your right hand to cut the kernels off (or with opposite hands if you're left-handed).  This will be messy.  I left the kernels in chunks when adding it to the soup, but you can break up the kernels if you'd like.


Sunday, August 8, 2010

Vegetarian French Onion Soup

Imagine this more beautiful with croutons and cheese on top.

I love French onion soup and had several onions and some port to use up, so it made sense to make some at home.  It is much simpler than I thought it would be with ingredients that probably most of us have around the house (other than the port.  So make it after a get together when you haven't finished your bottle of port-->exactly what I did).  Using vegetable stock rather than the tradition beef makes this edible for my vegetarian friends.  This may be a dumbed down version, but I made it up and it's still very delicious

You'll need (for 4ish servings)
  • 4-6 vidalia onions (depending upon size)
  • half a stick of butter
  • 1 clove of garlic, chopped or minced (your preference, I just hate cleaning my garlic mincer)
  • 1 heaping tablespoon flour
  • 2 cups of water
  • 1 tablespoon vegetable bouillon (or sub 2 cups of vegetable broth for water + bouillon)
  • 1/2 -1 cup of port (something on the sweet side, but not super syrupy sweet)
  • 2 tablespoons sugar
  • 1ish tablespoons of Italian Seasoning
  • 1 bay leaf
  • dash salt
The steps
  • Slice onions.  Do not dice them, just slice them in about 1 inch pieces.  
  • Melt butter in a pot.  Be sure the pot you're using has a thick bottom to avoid sticking.
  • Add sliced onions to butter and cook over medium heat until golden (about 20-30 minutes), stirring occasionally.  Add garlic about halfway through the cooking process.
  • Once onions are just starting to brown (but don't brown them!), add flour and stir rapidly until onions are lightly coated.
  • Add vegetable bouillon and water (or just broth).
  • Bring to a boil and add port.  Cook for about 10 minutes, or until you can taste that the alcohol has burned off and the soup has thickened.
  • While cooking, add sugar, seasoning, bay leaf, and salt.  Taste a few times, especially at the very end to see if you need to adjust the spices/sweetness.  End result should be earthy but a little sweet.  The color should be a pale purple/maroon.
To serve:
  • Heat up the broiler in your oven.
  • Either in individual dishes or in one large serving dish, place croutons (unseasoned, so it may be easier to just make your own by throwing some cubes of stale bread in the oven until crisp) and cheese (Swiss, Gruyère, or provolone) on top.
  • Place under the broiler for about 5-10 minutes until the cheese has melted and just started to brown.
Reward yourself with a glass of port and enjoy this very fancy (but easy) soup.  

Saturday, July 31, 2010

Green Beans & Corn, a summer dish

while still cooking

This is a good way to utilize the best things of this part of summer: green beans, sweet corn, onions, tomatoes.  Very simple, easy to make for groups, freezable, delicious.

You'll need (for side dishes for 4-6 people):
  • 1 pound green beans (I used a mixture of green and yellow beans because that's what was in my share)
  • half a yellow onion or a few green onions.  Green onions are best (using the whole onion), but I didn't have any
  • sweet corn: you can use one can of corn, a couple ears (boiled briefly then stripped), or one package of frozen (thawed in the microwave or stovetop)
  • a tomato or two
  • 3 tablespoons butter
  • 1-2 teaspoons of paprika
  • 1/2 teaspoon celery salt (optional, especially since I never remember to buy it)
  • salt to taste
The steps:
  • Wash & cut your green beans into nice bite size pieces, I'd say inch segments is good.  Be sure to snap off the stem ends.  I don't care about the little tail ends, but some people don't like those, so feel free to chop off.
  • Chop onion(s) and tomato(es)
  • Melt butter and add veggies and some salt & paprika in a deep skillet on high heat.  Skillet here is easier than a pot 
  • Cook on high heat, constantly stirring until corn is soft and beans are just cooked (there's little I hate more than overcooked veggies, especially green beans)
  • Season as desired.  I like a lot of paprika
  • Serve warm or cold.
I put some of this in the fridge to eat for the coming week and froze the rest in baggies so that I can enjoy these summer delicacies in winter.

Thursday, July 29, 2010

Tuna Bean Salad

I wanted to make a nice summer salad.  This is inspired by a salad we serve at my work.

You'll need (for 4-6 servings):
  • 2 small cans tuna
  • 1 can or half a big jar (think Randall's beans) of mixed beans (cannellini will work too)
  • One bunch fresh chard
  • 1/2 cup mayo
  • 1 tablespoon (ish) red wine vinegar
  • a clove or two garlic
  • 1-2 tablespoons dijon mustard
  • half a yellow onion, diced
  • Some grated parmesan cheese
  • salt and pepper to taste
Chop the chard and onion how you like and simply combine.  If you like olives, add some (chopped) kalamata olives and a bit of their brine (then use less vinegar).  Great plain or on a sandwich.

Friday, July 23, 2010

Super Easy Scones

Blueberry scones closest, chocolate chip scones farther.

I've just been craving scones, so this seemed a good idea.  Easy, pretty quick, and versatile.

You'll need (for 8 good sized scones):
  • 3 cups flour
  • 1/2 cup sugar
  • 5 teaspoons baking powder
  • 1 teaspoon cinnamon (or another nice seasoning, depending upon your add-ins)
  • dash salt
  • 3/4 cups butter (at room temperature)
  • 1 egg
  • 3/4 cup milk
  • 1/4 cup half 'n half (if you don't have half 'n half, just sub milk)
  • something tasty to add.  
The steps:
  • Preheat oven to 400 degrees.
  • Combine dry ingredients
  • Cut in butter using a pastry cutter, fork, hands, or food processor.  Easiest if you cut the butter into smaller pieces before adding.
  • In a measuring cup, beat together egg & milk
  • Make a well in the dry mixture and gradually add egg & milk mixture.  You likely will not use all of the liquid mixture.  Add it little bits at a time, mix in using a fork, and just keep adding until moist.  The consistency should be conducive to rolling out.
  • Add your goodies.  I added blueberries to some and chocolate chips to others.  Cranberries and orange zest is a good choice.  If you want something not so sweet, try dill or cardamom.  
  • You can either roll out the dough and cut it into triangle pieces or just grab it by the handful and shape it into triangles (I chose the latter).
  • Bake on a greased cookie sheet for 15 minutes.
  • Enjoy for breakfast, brunch, mid-morning snack, mid-afternoon snack.

Sunday, July 11, 2010

Raspberry Brownies

Just another recipe to use fresh raspberries.  And I wanted to make something deliciously chocolatey.  Most recipes online use raspberry preserves or mash up and juice their berries.  I wanted something strongly and tartly raspberry, so using whole, fresh berries.

For the brownie batter, you'll need:
  • 1 box of fresh raspberries (washed and dried)
  • 1 cup sugar
  • 1 cup flour
  • 5 eggs
  • 1/2 cup butter (softened nearly to melted)
  • 1 16oz can of chocolate syrup
The steps
  • Preheat the oven to 350.
  • Beat the eggs then combine all ingredients but raspberries
  • Pour this batter into a grease 9x13 pan.
  • Take about 2/3 of your box of raspberries and sprinkle them evenly over the batter in the pan.  Press the raspberries down until they are completely or mostly submerged in the brownie batter.
  • Bake for 35-45 minutes, until it doesn't jiggle.
  • Let cool in the pan.  Avoid the temptation to eat it all.
For the frosting, you'll need:
  • one 8oz brick of cream cheese (softened)
  • 2 cups powdered sugar
  • 2 tablespoons cocoa powder
  • 1 teaspoon almond extract.  (If you don't have almond extract, add some vanilla).
The steps:
  • Combine all ingredients until smooth.  You may want more or less sugar depending upon your taste in cream cheese frosting.  I personally like it not so sweet.  
  • Wait until your brownies cool then spread over the top.  This recipe will yield enough for a thin layer.
  • Use the remaining raspberries as a garnish on top of the frosting.
  • Reward yourself by licking your spatula.


Peanut Broccoli

Another recipe inspired by a similar salad we make at the restaurant I work.  This is an easy way to use up the stalks from your broccoli rather than putting them in the garbage.

You'll need (for enough for 2 people):
  • Stems from one head of broccoli
  • 1/2cup Peanut butter (chunky or smooth)
  • 1 1/2 tablespoons honey
  • 1-2 tablespoons hot water
  • 1 tablespoon rice vinegar
  • 1 1/2-2 tablespoons soy sauce.  If you want to make this gluten free, use gluten free soy sauce (Tamari)
  • 2 tablespoons olive oil
  • 1 tablespoon sesame oil (optional)
  • cayenne pepper to taste
The steps
  • Using a paring knife, peel the broccoli stems (especially the lower parts, away from the head) and chop  off any leaves and the very tough ends of the stalk.
  • Julienne cut the broccoli and place in a tupperware
  • In a separate bowl, place honey, peanut butter, and a little water in the microwave to soften.  Depending on the type of peanut butter you're using, it'll take 20-30 seconds.  The all natural peanut butter takes longer, but is delicious.  
  • Stir these ingredients until it blends smoothly.  I found that the all-natural peanut butter won't really make a smooth sauce, but you're run-of-the-mill Jif type will easily blend.
  • Add vinegar and soy sauce.  If it gets too hard to stir, add a bit of hot water.  You will need to add more water or olive oil to thin it out to the right saucy consistency.
  • Season with cayenne pepper until you like it.
  • Place sauce in same container as broccoli, put a lid on it, and shake until the broccoli is coated.  I found this to be the most effective way of coating the broccoli with the sauce.
Garnish with fresh cilantro, crushed peanuts, or the little ends of the broccoli head.  This is definitely a unique combination, but give it a try and you'll be surprised.

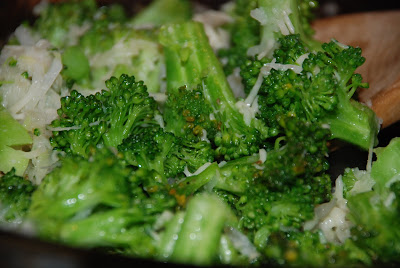
Parmesan Broccoli & Kohlrabi


So, this is a recipe inspired by the grilled broccoli we prepare at the restaurant I work at.  Easy, yummy, freeze-able.

You'll need:
  • One head of broccoli
  • One kohlrabi stem
  • 2-3 cloves of garlic
  • a few tablespoons olive oil
  • salt and pepper to taste.
  • sprinkling of grated Parmesan cheese
The steps:
  • Wash and chop broccoli heads into bite-sized pieces (don't throw away the stems!  See my peanut broccoli recipe)
  • Wash and peel kohlrabi.  Using the coarser side of your cheese grater, grate all the kohlrabi.
  • Chop your garlic cloves into little pieces.  I like this over minced for things like this.  But you can mince it if you'd like.
  • Heat a few tablespoons of olive oil in a pan on the stove.
  • Once the oil is of sizzling temperature, add the broccoli.  Sauté.
  • Once the broccoli is about halfway to done (don't overcook it!), add the kohlrabi and garlic.  You may need to add more olive oil at this point.
  • Add a dash or two of salt and pepper
  • Remove from heat, sprinkle with Parmesan and serve (or save).  

Tuesday, July 6, 2010

Cat Treats

I figure, why pay money for cat treats, when I can make them myself?  Easy peasy!  Modified from a recipe I found to suit what's in my cupboard and my fat cat.

You'll need:
  • 5oz can of tuna
  • 1/4 cup water drained from tuna.  If the water from your can of tuna doesn't equal 1/4 cup, measure out the remainder, rinse the tuna can with it, then use it in the recipe.
  • 1 egg white
  • 1/4 cup oatmeal
  • 1/2 cup flour (you can use whole wheat if you have it, but all purpose is fine too)
The steps:

  • Preheat oven to 350.
  • Mix tuna, water, and egg until combined.
  • Add oatmeal and flour.
  • Drop onto greased cookie sheet by small spoonfuls, keeping in mind that:  
    1. You're cat won't care what it looks like. 
    2. The size of the cookie should reflect the size of its consumer.
  • Bake for 20 minutes.
  • Make your kitty happy.

My cat, Artemisia, is much happier now with her treat--her reward for letting me trim her claws.

Sunday, July 4, 2010

Chocolate Covered Blueberries

So, this is my 4th of July dish, since blueberries, to me at least, feel right for the 4th of July.  And the blue will go with the tomatoes in the quiche I made earlier today.  The white, well, I suppose I will serve them on white dishes.

This will literally take you 10 minutes.  And is delicious.

You'll need: 
I don't have quantities here because you can adjust them depending upon how many people you're serving.  Basically, one bag of chocolate chips should roughly do fine with one box of berries
  • Fresh blueberries (brought to room temperature and dried after being washed)
  • chocolate chips
  • butter or shortening
The steps
  • Melt chocolate chips with a bit of butter or shortening in 15-20 second bursts in the microwave, stirring between each go 'round in the microwave.
  • Before you start assembling your deserts, be sure you have the container for them ready.  I used a flat skinny tupperware.  You may want to line with wax paper for easier cleaning later.
  • Once the chocolate is melty and syrupy and delicious, add the blueberries a handfull at a time. Stir the berries in, gently, until covered with chocolate.
  • Using a spoon and your fingers (best to keep spoon hand clean and only let the other hand get chocolatey), scoop out about 4-6 berries into your container.  Repeat, spacing the clusters just so they won't touch.  
  • When you've used up all your blueberries, use your spoon to scrape the sides of the bowl and drizzle this chocolate on top of your blueberry clusters (it's okay to eat some too).
  • Refrigerate your chocolate blueberry clusters for at least an hour or until the chocolate has formed a hard, delicious shell around the berries.
These are good on their own, with whipped cream, or over ice cream.

Declare your Food Independence and cook/eat locally for your 4th of July celebration!

Quiche

Quiche is one of my new favorites.  A good way to use up spare veggies and cheese that are close to turning or if you have eggs you need to use up in the fridge.  I make the pastry dough myself, which was certainly intimidating until I learned.  Hopefully this explanation will be simple but thorough enough to avoid any intimidation.  Homemade crusts aren't hard once you learn.  And you'll never go back to store bought crusts after that.

If you plan to make this quiche all the way through (from making dough, rolling it, baking, filling, and cooking), there's a lot of wait time, so bake on a day that you have the time and a new magazine just came in the mail or you just bought a new book.

For the quiche crust, you'll need:

  • 3 cups flour
  • touch of salt
  • tablespoon or so Italian seasoning (Yes, I advocate trying your uncooked dough to see if you want to add more seasoning.)  This is a key ingredient and makes the dough oh-so-delicious!  I use the cheapest, most generic blend available
  • 1 cup chilled butter (I use salted, though most recipes you'll find call for unsalted.  This means I use less salt in the rest of the recipe)
  • 1 egg
  • aluminum foil
The steps:
  • In a large bowl, combine flour, salt, and Italian seasoning.  A good indicator that you have enough seasoning is that your mixture will be speckled like a Dalmatian.
  • Cut the butter into small pieces and add to the bowl.  
  • To blend the butter with the flour, it's best to use a pastry blender, but I'm too cheap to buy one, so I use my sturdiest fork and my hands.  You don't want the butter to be totally combined, but rather like little pebbles in the flour, or, at the very best, a coarse meal.  Of course, you don't want to handle the butter too much either and melt it.  I usually go at it with the fork, cutting it in small pieces and combining as best I can.  Then I use my fingertips to pinch the butter into little pieces.  Try to have pieces be of somewhat uniform small size, but it's okay if there are some bigger chunks.
  • In a small bowl, beat the egg with 2 tablespoons cold water.
  • Make a well in the flour mixture and pour in the egg and a couple more tablespoons water
  • Using the fork, gently combine egg and flour, adding more cold water as needed until the mixture holds together.  You don't want the consistency to be sticky like cookie dough, but more like biscuit dough.  Just add water and mix very gradually until it just barely sticks together.
  • Pat this dough into a ball, cover in Saran wrap, and refrigerate for an hour.
  • While the dough is cooling, you could work on the filling.  I'll describe some options below.
  • After that hour is up, clear off a large surface and dust lightly with flour.  Also dust your rolling pin with flour. I usually refrigerate my rolling pin along with the dough for that hour (or at least 15 minutes) to help with sticking.
  • Roll out the dough until it's less than a half inch thick, but not too much thinner than that.  
  • Be conscientious when your rolling of the shape of the pan in which you'll be baking.  I usually bake in a 9 x 13 pan, so it's easy to roll into a rectangle.  This recipe will allow you to fill that 9 x 13 and have leftovers (more on that later).  If you are using pie pans, roll circularly.  This recipe would fill 2 pie pans.
  • Transfer the dough into greased baking pan and trim off any excess.  If you're feeling fancy, you could pinch the top edge of the dough to make it look nice, but it'll be delicious even if you don't.
  • Prick the bottom of the dough several times with a fork.
  • Cover dough with aluminum foil, shiny side down, and place in the freezer for a half hour.
  • After that time is up, bake the crust, with the foil, in a preheated oven at 425 for 8 minutes.
  • Remove the foil and bake until crust looks dull (the butter has soaked in.  Yum!).  About 4 minutes.
  • Remove from oven, reduce heat to 375.  If you are putting cheese in your quiche, sprinkle it on the hot crust now.
For the filling:
  • Basic ingredients all to be blended together: 3 eggs (beaten), 1 pint half 'n half, teaspoon sugar.
  • To this mixture, you can add all sorts of things.  Of course, I love cheese, so put some of that directly on the crust before your add the mixture.  Then just use any veggies you may need to use up.  Because you can't test before the quiche is complete, you'll need to do some sampling just by making quiche every once and awhile and paying attention to what worked and what didn't.  Some veggies work better when cooked before, others are fine if put it raw.  Use your best judgement (or Google someone else's).
  • Some combinations I know are delicious:
    • spinach & feta: before adding, sauté the spinach in olive oil with some minced garlic
    • radishes, leeks & mozzarella: I also used the radish greens and diced up all the veggies nice and small.
    • Turkey & vegetable: roasted turkey chunks, asparagus, whatever other veggies you have.
    • leeks, tomatoes, snow peas, & parmesan: well, I don't know if that's delicious or not.  I'm working on it right now (dough is chilling in the fridge as I type)
  • Once you have your combination settled, whisk the eggs, half 'n half, and sugar together then add your other ingredients.
  • Pour this into the crust
  • Bake 35-40 minutes, until it doesn't jiggle anymore.
  • Let stand for 5-10 minutes before serving.
Other tips/ideas
  • If you don't have all the time or aren't going to serve it right away, a great trick is to prepare the crust and veggies ahead of time.  Then place the veggies in the fully baked crust and freeze (a grocery bag or trash bag, tied off, works fine) until you need it.  When you are ready to bake, let thaw for a few hours, whisk up egg mixture, combine, and bake.  
  • As I said earlier, this recipe will leave you some leftover dough if you use a 9 x 13 pan.  What to do?  you can freeze it and use it in the future for whatever you want.  I've been making mini-quiches.
  • Yes, mini-quiches.  If you want to avoid this weird numbers game of having leftover dough, just make lots of mini-single serving quiches.  This could also allow you to personalize quiches to people's tastes (if you're feeling particularly generous).  Here's how I do it:
    • Grease a ceramic bowl that you plan to bake and eat out of.  I use a bowl I or a friend made, because the shape and size is nice for this.  If you have small, single-serving size glass or corningware, you can use those.  Personally, I think the ceramic bowls are extra nice looking
    • Place the greased bowls in the oven and preheat to 425.  You only need to do this if you're using ceramic bowls which you need to be gentler with in terms of drastic temperature changes.  
    • Once the oven is preheated, remove the bowls and carefully line them with the pastry dough.  Bake pastry dough as directed above, though the times may be shorter.  Difficult to make uniform as everyone's bowls or dishes are different.
    • Once the crusts are done, reduce heat on the oven to 375, remove the bowls, prepare the filling, fill the bowls, and cook.  Again, timing may be different than in a larger pan.
  • You can always make dough, roll it into a ball, and freeze it for later.
  • You have to use real butter for the pastry dough.  Sorry, no margarine here.  Besides, there's like 3 ingredients in butter and how many in your vegetable butter replacement?  I know I know, fat, cholesterol, etc.  Here's my theory: enjoy your food, savor every bite.  Rather than rush through crappy food that may be made with margarine or artificial sweeteners (and what the hell are those made of?), eat slowly and appreciate the flavor of your food.  Relax.  Then you'll eat smaller portions (if you eat slower, you eat less).  
Okay, quiche away!

Ideas?

Have anything you need a recipe for?  Or suggestions for something I should try?  I'm wide open.  Leave a comment or send me a message.

Saturday, July 3, 2010

Fresh Raspberry Vinaigrette

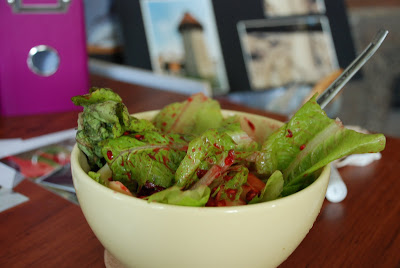
My lunch (delicious!)

I always like to make my own salad dressings because they're healthier, yummier, and less expensive.  In looking to make a raspberry vinaigrette dressing, all the recipes called for raspberry vinegar, but I wanted to use the fresh raspberries I'd just gotten 2 days ago in my CSA share.  So, I improvised this one.  Here's what I figured out.

What you'll need for about 3-4 meal-sized servings (if you're like me and go light on the dressing):
  • one box fresh raspberries
  • 2ish tablespoons olive oil
  • heaping spoonful sugar
  • a few tablespoons red wine vinegar (about a 2:1 ratio vinegar:oil)
  • 1- 1 1/2 tablespoons dijon mustard
  • small clipping of fresh Italian parsley, chopped or pulled apart (like the top 1 1/2 inches of a branch).  If you don't have fresh, use maybe a teaspoon or so of dried.  Maybe more.  Taste and figure it out.
  • salt to taste
  • lemon juice (I didn't add any because I don't have any, but I think it'd be delicious!)
The steps:
  • Mash the raspberries as best you can in a bowl using a spoon or a fork.  If you have a food processor or blender (of which, I have neither), use that.  Then you can strain this mixture through a mesh screen to get rid of the seeds.
  • Add sugar, oil, vinegar, and mustard.  Do all of these gradually, especially the mustard, as it's easy to over do.  You may want more mustard because you like a stronger Dijon flavor.  I like it mild, so I didn't use too much.  Ending consistency should be a thick sauce, kinda resembling French dressing.
  • Season with parsley, salt, and lemon juice until delicious.

I served this over just a simple green salad with chopped apples and Parmesan cheese.  Would be great with some cottage cheese (but mine had little green colonies in it!).  Grilled chicken on the salad would make a complete, filling meal!


Exciting purchase of the day: mini herb garden.
I went to the farmers' market this morning to pick up a few things, especially on the hunt for some fresh herbs.  I found a little pot that had in it parsley, cilantro, and basil.  Just perfect!!  It has a place of pride in my kitchen now.  Hopefully, I can foster these plants enough so that they'll outgrow that pot and I'll need three pots.  Save so much money!

Sunday, June 27, 2010

Cowboy Cookies #3

Sorry, no picture.  I ate 'em :)

I am always on the quest to make delicious cookies and to try not to repeat recipes over and over again (aside from standby chocolate chip, which everyone loves).  I've recently grown to love oatmeal cookies especially, modifying them by adding lots and lots of goodies.  These are baked in a muffin tin, making thick, moist cookies.  If cooked on a cookie sheet, these cookies will spread out very thin and be difficult to handle.  

You'll need (for about 3 doz):

  • two small boxes fresh raspberries
  • 1/2-1 cup shredded coconut
  • 1 bag semi-sweet chocolate chips
  • 1 1/2 cups flour
  • 1 tsp baking soda
  • 1 tsp pumpkin pie spice
  • 3/4 cup butter or margarine (I prefer butter!)
  • 3/4 cup packed brown sugar
  • 3/4 cup regular sugar
  • 2 eggs
  • 2 tsp pure vanilla extract (yes, the real stuff is twice as expensive, but it's one of those things that's worth the extra cash)
  • 1 3/4 cups old fashioned oats (not the quick kind, though, in a bind, those will work also, but the texture may be weird, or you may need to adjust other quantities
The steps:


  • Just like any other cookie recipe.  Preheat your oven to 375
  • Combine softened (not melted) butter & sugars.  You can do all this mixing with a stand mixer if you have one, but be careful not to over mix.  Mix until just combined.  I don't have a mixer, so I just use my handy silicone spatula.
  • Add eggs and vanilla to this mixture
  • Gradually add in flour, baking soda, and pumpkin pie spice
  • Once that is all combined, add the oats and coconut.  You can adjust the amount of coconut depending upon how much you like it.  I like a lot, so would probably do 1 cup for this much, but some people don't like it as much.
  • Add chocolate chips
  • Raspberries are the last to add and should be folded in very gently to avoid too much mashing.  It's somewhat unavoidable to squish a few, but try to be calm, cool, and collected when folding them in.
  • Drop by heaping spoonfuls into a greased muffin tin being careful not to over-fill or get dough all over the place.
  • Bake for about 12 minutes.
  • After cookies have cooled, place them in some sort of container be it tupperware or plastic baggies and place in the freezer.  Trust me.  In a few hours, you'll have amazing, cool, chewy cookies.  They're pretty much impossible to eat at room temperature because they're so soft and crumbly, but frozen, it's decadent (and perfect for these 95degree days we've been having).
Modifications


  • You can add other things to these like nuts or not use coconut, whatever you want.  I've made a ton of oatmeal "cowboy cookies" with many different combinations, and this one is definitely my favorite (so far)

Bake away and impress your friends!

Garlic Scape & Cilantro Pesto

This is a delicious, unique pesto.  Easy to make too!

You'll need:
  • A big bunch of garlic scapes.  Enough to fill a produce bag.
  • A big bunch of fresh cilantro
  • shredded parmesan cheese
  • a few tablespoons of olive oil
  • crushed red pepper
  • 1 spoonful sugar
  • kosher salt (I like this better than regular salt because it takes less of it.  The coarse grind is also better for pestos)
The steps:
  • If you have a food processor, this is 5000 times easier.  Place cilantro and garlic scapes in food processor and chop until fine.  I don't have a food processor, so I hand chopped them
  • In a bowl, combine cilantro and scapes with olive oil and parmesan cheese.
  • Season with crushed red pepper, salt, and sugar until delicious.
Modifications
  • Add some pine nuts or pistachios.  I just didn't have any.  
Serve this over a "shape pasta" like shells or penne so they can hold onto the sauce.  This sauce would freeze well too.  you don't need much for a serving, so use sparingly.  It'd a pungent sauce.  Could be thinned with more olive oil or, if you want meat, add some chicken.

Enjoy!